Over time, radiators can lose their original shine and turn yellow, which can affect the overall appearance of your home. But don't worry – there are a few simple steps you can take to get your radiators looking new again. Here's a detailed guide to refreshing and restoring yellowed radiators.
WHY RADIATORS TURN YELLOW?
Before we dive into the restoration process, it's important to understand why radiators turn yellow. The main reason is exposure to heat and light, which can cause certain types of paint to change color over time. Also, smoke, dust and daily use can contribute to this problem.
STEP 1: PREPARATION
The first step in restoring your radiators is thorough preparation. Turn off the radiator and let it cool completely. Protect the floor and furniture around the radiator with a tarp or newspaper.
STEPS 2 AND 3: CLEANING and GRINDING
Before you start painting, it is important to clean the radiator well. Use a mild detergent and water or specialized cleaning products to remove dust, grease and other impurities. After cleaning, dry the radiator well.
If the paint on the radiator is cracked or peeling, it is necessary to lightly sand the surface to remove irregularities. This will help the new coat of paint adhere better. Use fine sandpaper and gently sand the surface.
- Metal radiators: Clean grease with nitro thinner. Remove the rust mechanically. Clean the dust with a clean cloth.
- Copper pipes: Clean grease with nitro thinner. Then sand the surface with a synthetic fiber sanding cloth. Do not use wire brushes.
- Old coatings: Remove damaged coatings completely. Finely sand and clean undamaged coatings.
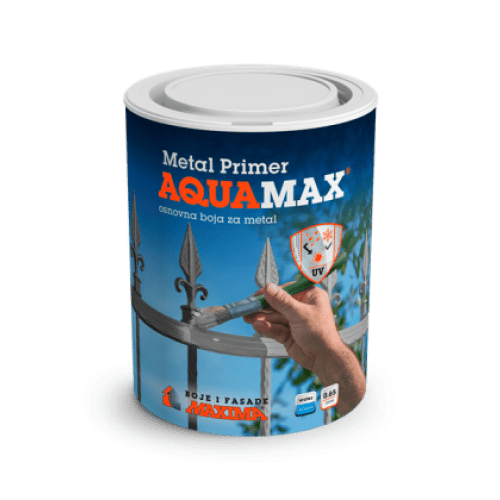
STEP 4: APPLYING THE PRIMER COAT
For radiators that have turned yellow, it is recommended to use a high-quality primer that will help cover up the old colors and ensure that the new layer of paint lasts longer. Choose a primer suitable for high temperatures.
Recommendation Thermodynamics it is an expert to coat the surfaces with a base paint for metal AQUAMAX Metal Primer, and everything according to the instructions. Apply after 6 hours, or when AQUAMAX Metal Primer dries AQUAMAX Radiator varnish.
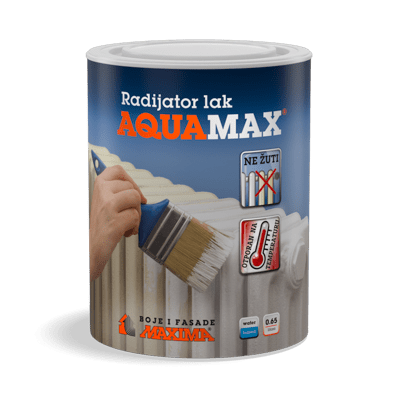
STEP 5: PAINTING/LACQUERING
When the primer is dry, it's time to paint. Choose paint or varnish for radiators that is resistant to high temperatures and will not turn yellow over time. Apply paint or varnish evenly, using a brush or roller.
Recommendation of Thermodynamics experts is the use AQUAMAX Radiator varnish for radiators and radiator pipes, based on an aqueous dispersion of acrylic binders, resistant to high temperatures, up to 120 ℃. AQUAMAX Radiator varnish does not turn yellow and has no unpleasant smell, it is extremely durable, hard, has excellent covering power and elasticity. It is used to protect new surfaces and repair old coatings.
STEP 6: DRYING
After painting, it is important to allow the radiator to dry thoroughly before turning it back on. Follow the paint manufacturer's instructions for recommended drying time.
MAINTENANCE TIPS
- Clean the radiators regularly to prevent the accumulation of dust and dirt.
• If possible, avoid direct exposure of the radiator to sunlight to reduce the risk of yellowing.
• Use mild cleaners to avoid damaging the paint surface.
By restoring yellowed radiators, you will not only improve the aesthetics of your home, but also increase the heating efficiency by ensuring that your radiators are working at their optimum level. With a little effort and attention, your radiators can look like new and contribute to the pleasant atmosphere of your home.
For more information, contact us or visit our branches in Zagreb or Split.